Name
Pterophyllum scalare (ter o fill' um ska lar' e)
The scientific name for the freshwater angelfish is quite descriptive. Pterophyllum is derived from the Greek word for "winged leaf" and scalare means "like a flight of stairs" in reference to the dorsal fin. It is a Latin word that can also mean "ladder". Angelfish are laterally compressed or look like a disc on edge with long fins coming out of the top and bottom and have 2 'feelers' in front of the anal or bottom fin. The tail is vertically oriented and may be ffrom scoop shovel shape to long and relatively narrow depending on the variety. Origin
Amazon region of South America Size
Up to 6" in length, the top and bottom fins spanning a greater distance in the Veil varieties. Ideal Water Quality
Soft (0.6 to 1.2 dH), slightly acid (pH 6.5 to 6.9), successful breedings have occurred in pH 6.8. Live Plants
Live plants should be included in all freshwater tanks. Water quality is monitored by live plants as they will look sickly before the fish die, they aid in keeping water clear, hinder growth of algae and add Oxygen to the water. Broadleaf aquatic plants are favorites of Angelfish for laying their eggs on. Amazon Sword Plants (Echinodorus) are in a genus that embraces more than fifty relatively hardy and adaptable species, most of which are native to the flood plains of South America. They prefer water that is neutral or slightly acid and not too hard making them perfect plants for your Angelfish tank.
Vesicularia dubyana (Java Moss), Ceratopteris (Water Sprite) and Microsorium (Polypodium pteropus or Java Fern) are all compatible live aquatic plants.
Diet
Angelfish can survive on flake food alone, but they will thrive and be much more apt to breed on a greatly varied diet. Live foods such as Adult Brine Shrimp, Black Worms, Mosquito larvae, finely chopped earthworms and Guppy fry are accepted with enthusiasm and should be included regularly. If live food is not available, frozen packages of Blood Worms (Midge Fly larvae), Brine Shrimp and others are available from your favorite pet supply store and are acceptable substitutions for the live food. There are many dried foods available that will suffice too. Raw beef heart, finely ground, mixed with unflavored gelatin and frozen immediately in small one serving size pieces is a good and economical addition to your Angelfish diet. Be absolutely sure there is no fat in the meat.
Fry Diet
Angelfish fry have been successfully raised on a diet of newly hatched Brine shrimp (napulii) for the first 4 weeks of their lives and fed two to four times daily. After that, they were gradually introduced to a mixture of finely powdered Angelfish flakes and powdered dried blood worms with an occasional (twice a week) feeding of baby brine shrimp. When their bodies are about the size of a quarter, they may be fed Guppy fry. An easy way to provide this very nutritious food is to keep pregnant guppies in the same tank as the young Angels and the rest is up to nature. Of course feedings of other varied foods are needed to round out the diet.
The author conducted an experiment and got 6 quarter sized Angelfish from a large tank of like sized Angels and put them in a 10 gallon tank with a sponge filter and Water Sprite. They were free fed guppy fry and twice a day received any combination of Angelfish flakes, frozen bloodworms, frozen brine shrimp and dried dworms for 4 weeks. At the end of the experiment, the 6 who received a varied diet twice a day were almost the size of a half dollar while the size of the other Angelfish barely had any noticeable growth at all. You can see that the correct diet for your Angels is essential to potential and current breeder fish.
Tank Size
The minimum size tank for a breeding pair of Angelfish is 15 gallons, but should be 25 gallons or larger if you plan on leaving the fry with the parents. As you can imagine, a fully grown pair of Angels with 200-300 fry to herd around would be pretty cramped in anything smaller. Another plus to having a larger tank is that there is a better feeling of security in a larger tank and the parents aren't as apt to eat their eggs or young.
Choosing Breeder Angelfish
The best way of assuring yourself at least one young pair is to choose 6 perfect specimens from a large tankful of young angels. This method is less expensive than buying proven breeders that may be near the end of their breeding careers anyway. When preparing to buy 6 Angelfish, take your time to study the fish and select only those with straight top and bottom fins and perfect 'feelers' without any bowing or bends in them. They should be strong, robust and active. Angelfish that are active feeders mean they will grow quickly, and have a high rate of egg production in the females.
Do not buy fish from a tank with either dead fish in it, with fungus or parasite infestations. Resist the urge to 'come to the rescue of the little ugly duckling' because it will only grow up to be a big ugly duckling and will be totally unsuitable for breeding purposes. Be extremely picky with your breeder selection and you will be rewarded with beautiful fry.
Once you have carefully selected your 6 potential breeders, they can be set up in a 20 gallon tank minimum to grow up in and to finally pair off. If they are fed well with a good selection of live foods, they will grow quickly and reach breeder size rapidly.
One sure way to acquire a true breeding pair of Angelfish is to purchase a proven pair from a breeder. When you purchase a pair this way there is always the possibility that they are at the end of their breeding career.
Spawning
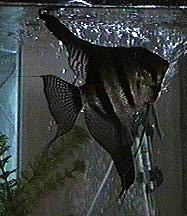
![[2 angel fish]](http://fins.actwin.com/fresh-pics/angelspawn.gif)
This 30 second video shows two freshwater angelfish spawning, the newly hatched fry a week later, then one and two months later. The quicktime version is 1.9 Meg. The mpeg is 1 Meg.
In mature fish, breeding can be stimulated by a partial water change and a rise in temperature to between 80 and 82 degrees F.
One sure sign that spawning is about to occur is the appearance of the pair's genital papillae. These look like little nipple-like projections and are called ovipositors (oh vi poz' uh turs), a word that literally means "egg-placer(s)". The female's ovipositor is larger and more blunt than the male's which is slender and more pointed. These protuberances which appear at the vent are used respectively for depositing eggs and fertilizing them. The obvious differences in the genital papillae are the first completely reliable indication of sex determination.
The pair will select a spawning site and thoroughly clean it about two or three days before actual spawning takes place. When the cleanliness of the spawning site finally meets the approval of the parent fish, the female will make a few test runs. She will pull her ventral fins or feelers close to the lower sides of her abdomen and her anal fin will be situated so that her entire lower line is relatively straight. Her ovipositor will then be able to make full contact with the slate, leaf or whatever was chosen for a spawning site. The male will then make a few practice runs too before the actual spawning takes place.
When spawning actually takes place, the female will pass over the site and eggs are deposited which adhere to the surface. The male then moves in and scoots along over the string of eggs just laid and fertilizes them, his fins taking the same position as the female's so he can press closely to insure a higher fertilization rate.
The male and female Angelfish will take turns making passes over the spawning site until several hundred or more eggs have been laid, depending on the size and condition of the female prior to spawning. The parents will hover closely over the spawn and fan continuously with their pectoral fins to create a circulation of water over and around the eggs. Some unfertilized eggs will turn white in a matter of hours and will be removed by the parents.
Hatching Eggs Away from Parents
Should you decide to remove the eggs after spawning to raise away from the parents, a bare 15-20 gallon tank with sponge filter and a piece of slate leaned up against a side wall would be the angelfish will use the piece of slate to lay their eggs on making it easy for you to remove the entire spawn. A restaurant sized pickle or mayonnaise jar submerged into the tank and the slate with the spawn gently transferred into it is the best way to handle the delicate eggs which should be facing upward. An airstone should be placed in the jar in such a way that the somewhat vigorous stream of air bubbles does not hit the eggs directly. The jar should be floated in the tank so the temperature remains constant and that water changes can come from the parent's tank.
Successful breeders have used this 'formula' for the water in which to raise the fry: Dechlorinated tap water measuring about 75-100 ppm hardness or about 5 DH and a pH of about 7.4 and kept at 80-02 degrees F. A one gallon pickle jar was used and tilted, filled 3/4 full and 3 drops of 10% Methylene Blue was added. The aeration was vigorous and each day after hatching, one-half the water was replaced with aged tap water of the same temperature. Aeration was slowed after the fry were free swimming.
Hatching should occur in about 36 to 48 hours depending on the temperature. If you should see some eggs fall off the slate, you may elect to either pick them up with an eyedropper or turkey baster and squirt them back on the slate or leave them to hatch where they are.
There will be a period after hatching and before free swimming when the fry will stick together. At this time increase the aeration so ALL the fry will have access to sufficient oxygen.
Do not put food in the jar until they fry are free swimming. This will only serve to foul the water and they won't eat while they still have a yolk sack to live on. After about 3-5 days when they are free swimming, you may introduce newly hatched brine shrimp into the jar for the fry to eat.
Leaving Fry with Parents
If the parents are to be left with the eggs, it is best to provide as much peace and quiet for them as possible. You may want to set up their tank in your bedroom or a spare room where they will not be unnecessarily disturbed. Other than that, they should be treated as you normally do. Some aquarists cover the tank with paper or black plastic and use peep holes to observe the fish. This can cause more disturbance than without the cover because there is no warning for the fish when the lid is going to be opened for feeding or for any other reason.
The best system for filtering a fry tank is a seeded corner sponge filter. Start your new Rotifer (roe' tu fur) bacteria colony by putting the new sponge filter with aeration into an established tank. This should be done long before you have to use it so that all you have to do is pop it into the fry tank when the time comes. The sponge will begin to discolor when you have the start of your colony.
The circulation of water is gentle, the fry won't be sucked into the sponge and even baby brine shrimp are safe with a sponge filter. Clean the sponge in a bucket of siphoned off aquarium water to protect the Rotifers from dying, wring it out a couple of times and it's ready to go back to work even in a completely bare aquarium.
Undergravel filters also work biologically, but are not as convenient to use in this instance. A scrupulously clean aquarium is essential for proper growth and health of your Angel fish fry, but with an undergravel filter, this is almost impossible to do. The water can look crystal clear while the space under the filter can be filthy with uneaten food and fish waste. This in turn causes ammonia build-up which is dangerous or even fatal to fish.
It is obviously very difficult if not impossible to keep a fry tank with an undergravel filter in it perfectly clean.
Angelfish Varieties
While most mutations are lost in nature because they are different, the aquarist can provide added protection for the creature and possibly breed it selectively to establish the new strain.
This is the normal coloring of wild Angel. The body is white with 4 dark vertical bars running through it. The first passes through the eye, the second usually is in front of the top and bottom fin, the third is usually through the top and bottom fin and the fourth is at the start of the tail fin. There may or may not be faint dark bars running parallel between the darker ones. Some specimens have black speckles over the top half of the body.
Zebra
These are much like the Silvers, but they have more vertical stripes which continue on right through the tail.
Black Lace
Black Lace are the steppingstones to the solid black variety. The main difference between Black Lace and Silvers is the intensity of color especially on the fins where you will see a lace like effect. In mating 2 Black Lace, you can expect to produce 25% Black, 50% Black Lace and 25% Silver. The Black fry are especially fragile and a lot of times don't survive to free swimming and if they do, should be separated from their more vigorous littermates.
Black
These fish are a solid, velvety black. In mating a Black to a Black Lace you can expect 50% Black and 50% Black Lace and if you mate Black to Black you can expect 100% Black.
Half Black
Half Blacks are just that. Their bodies are white in the front and the black cuts right through the top and bottom fins right through the tail.
Veiltail
Veiltail Angels have very elongated fins and come in all color varieties. If a Veil Angel and a Silver are bred, you can expect 50% Veil and 50% Silver. Breed 2 Veils and you can expect 25% ordinary Angels, 50% Veil and 25% Long Tailed Veil which will have even longer fins and tails than the Veil. Breeding 2 Long Tailed Veils will produce 100% Long Tailed Veils, but they are not as hearty nor are the spawns as large. Some Veils have such long fins that they become bent or at worst broken.
Instead of having the ordinary black bars, these fish have a broken pattern of black and silver that is best described as Marble. In the head and back region there may be undertones of golden while the fins have rays of black and white. A breeding of a Marble with a Black Lace will produce some fry which are Black Lace Marble, having characteristics of both parents.
Golden
Goldens may range from a solid silvery white to a golden color with no other markings. Over the head and back area is usually a mantle of gold.
Blushing
Blushing Angels have a red cheek area and no pattern on a white body and are reported to be the most delicate.
Pearl Scale
Pearl Scale Angels have bumpy almost rough looking scales and come in many color varieties.
Diseases
Angelfish are apparantly not as apt to contract the common diseases that other tropical fish are. However, I will list some common ailments for your reference. Ichthyophthirius or Ich
Otherwise known as "white spot disease" because of the appearance of the encysted adult parasite on infected fish, Ich is caused by the protozoan parasite Ichthyophthirius multifiliis. Angelfish are less susceptible than many other tropicals, but occasionally contract this disease. Ich goes through three definite stages: First, the adult parasite lives in the skin of the host fish, feeding on the tissue and body fluids of the fish and appears as a white spot; second, the mature parasite leaves the host and falls to the bottom where it divides; third, as many as 2000 free-swimming youngsters all seek a host fish that they can attach to. This is the stage where most treatments are affective.
Higher temperatures will cause the cycle to complete faster so it is suggested that you raise the temperature to around 80 degrees F. as part of the treatment. This gives the free-swimming parasites less time to find a host before they die.
Your favorite pet supply store will have Ich medication on hand.
Exophthalmia or Pop-Eye
This is one of the more often encountered diseases of angelfish although not common. Pop-eye is a symptom, not a disease and it can have a number of causes. Some are incurable, some can be cured. Some of the causes of this condition are: Not making partial water changes often enough resulting in a build-up of dissolved waste products, infection by a parasitic fungus called Ichthyosporidium. Other symptoms of this disease, also known as Ichthyophonus, are usually present when it is the cause of Pop-eye. The symptoms are body sores, bloody spots,staggering, black spots,tumors that have erupted, emaciation or scale protrusion, loss of fins. Usually this is introduced with other fish and is considered incurable. Some success has been reported using 1% phenoxetol at about 50cc per gallon of water.
Bacterial infections can also cause Pop-eye and may be treated with 50 mg. per gallon of Tetracycline or Terramycin added every other day or mixing with the food 200 mg. antibiotic to 4 oz. of food and feeding this for 10 days.
Another cause of Pop-eye is otherwise known as "worm cataract disease". The eyes bulge and the cornea becomes cloudy because of the invasion of types of flatworms. These must live through a stage in which snails are the intermediary host and if they don't find a fish within a short period, will die. Once a fish is infected, there is no effective cure.
This parasite is introduced with snails, so wild snails should be avoided. Aquarium snails pose no problem as they are not exposed to water birds who serve as another intermediary host and from which the snails become infected.
Hunger Strike
Loss of appetite and eventual refusal to eat should not be a problem in a well maintained tank. As long as regular partial water changes are made and the general guidelines for cleanliness are followed, this should never happen to you. In case you notice your angelfish going "off their feed", bribe them with live brine shrimp, live guppy fry or any other clean live food. In no time they will be eating again.
![[Picture of fish labelling the anatomical parts]](http://fins.actwin.com/articles/disease/diagram.gif)
 Router: Probably one of the most important tools you will use for achieving professional quality results. Routers may run between $100 and $300 depending on quality. A router, which is capable of accepting both 1/4 inch and 1/2 inch shank bits, will be beneficial. You also want a router that can be fitted with guide collars. Another thing to keep in mind when purchasing a router, many of the methods I will be describing are based on mounting your router under your work table with the cutter protruding from the surface. Look for a router, which you feel, will be easy to mount in this manner.


